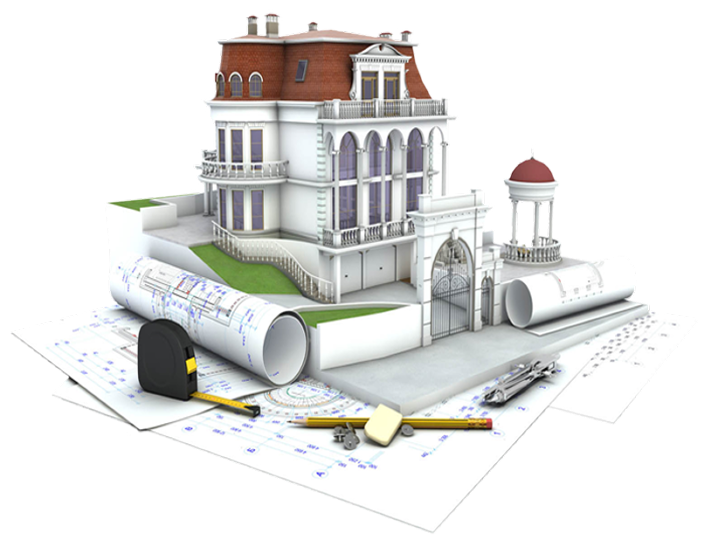


At TVS Cube, we focus on delivering high-quality 2D & 3D animation services to complement the aesthetic and interactive requirements of the design proper. Using our experience in Cad and Revit, you can enhance your Cad and Revit projects, and produce amazing animations that will let you better explain your design, and make things easier to understand for the clients.
Accuracy is highly valued in architecture, especially in the design field, which is a core part of architectural design. Among the most useful tools that we have to maintain accuracy and efficiency are Cad and Revit software. These programs are industry standards for architects, engineers, and designers to provide solutions for management and cooperation in large models. One of the issues though is loading linked models — files that are incorporated into your primary Revit project. This blog will be a step-by-step guide to how it is possible to make Revit snap to linked models, and also give practical advice on how best to work efficiently. Moreover, let’s discuss how TVS Cube can enhance your design projects with extraordinary 2D and 3D animation solutions.
Understanding Snapping Mechanisms in Revit
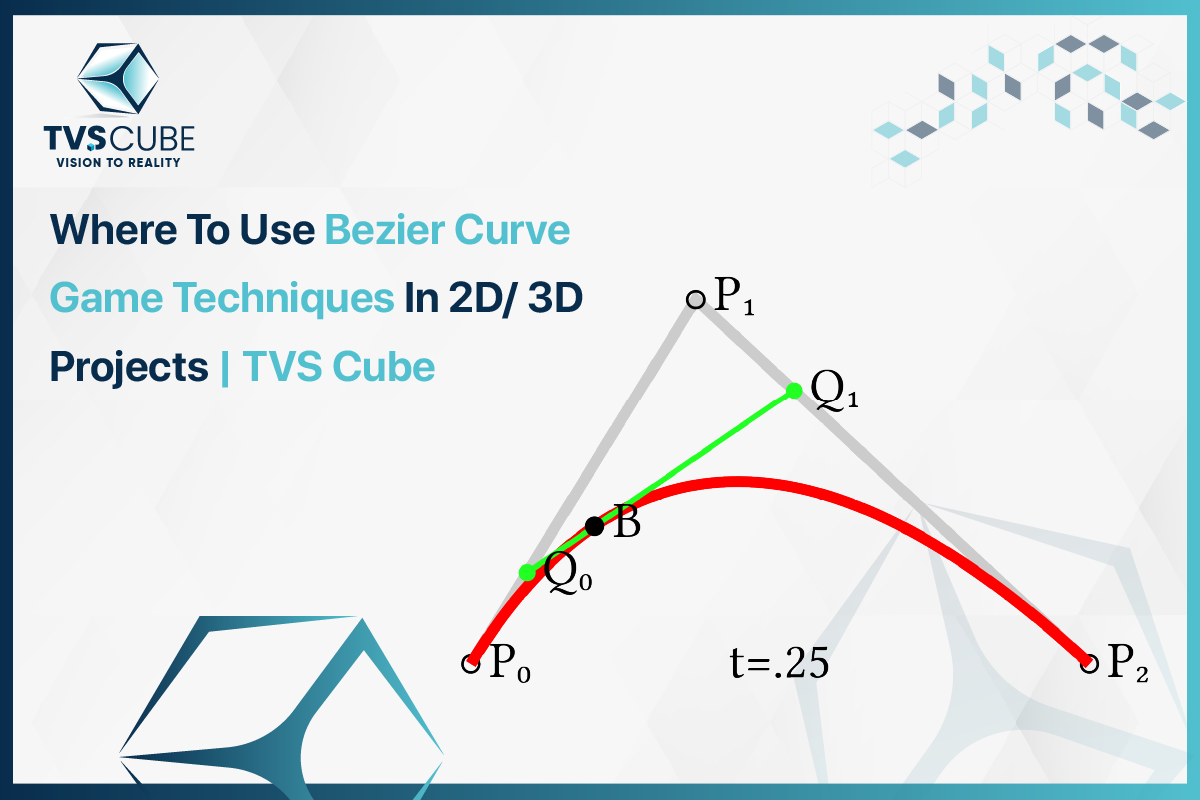
The Cad and Revit snapping tool allows the user to align the elements or place them perfectly at the desired location. These tools allow the user to correctly align objects based on coordinates by ‘snapping’ them to specific coordinates on an object such as the endpoints, midpoints, or intersections. This functionality is important particularly to assemble files from different disciplines like architectural, structure, or MEP files, and works magnificently once we have intricate designs to assemble. Revit 2025 Copy Monitor is a feature that allows users to track and manage changes between linked models, enabling the synchronization of elements like walls, doors, and windows across different models.
Key Snapping Mechanisms in Cad and Revit:
- Endpoint Snap: The snapping to the last portion of a selected line or object.
- Midpoint Snap: When the cursor is moved up and down to the center of a line or object.
- Intersection Snap: Pop shots of the location where two objects touch.
- Perpendicular Snap: Click and drag to the point online or on another object that is perpendicular to the point snap. These snapping tools built in Cad and Revit help to increase accuracy and also contribute to the optimization of working time.
How to Set Up and Use Linked Models in Revit
Project-linked models in the Revit program allow for the integration of other models in a main project, which is a strong component of the program. Such linked models may involve an architectural model or structural model or MEP model, and any of these are referred to as coordination models. As for the linked models in Revit, it is crucial to learn their function on the project before creating the models. It is used by other models which are still independent but can be seen in the host project to foster integration between different teams.
Linking Models in Revit
To link a model in Revit, go to your primary project, and on the Insert tab click the Link Revit option if linking another Revit model, then select Link CAD if linking a CAD file. After making a selection of the file, the model is placed at your project’s disposal. As for other linked model positions, you need to ensure that all models are also positioned at the right places depending on the nature of your ongoing project.
Jumping to Linked Models in Revit
To make Revit snap to a linked model, first go to the manage tab. In the Snaps section and in the Snaps column, simply click on the Snaps link. Here you can make sure that all the required snap options are turned on. This includes the critical option: Snap to Coordination Models. These options when enabled allow you to select directly on the geometry of the linked models, this is very crucial in positioning. This functionality makes elements in your project fit well with the linked models as planned.

Customization of Snap Points in Revit
Not only can Revit snap to all the linked models but also, it is also possible to select the snap points that are to be activated. To do this, click the button Snaps under the Manage tab or you can find the Snaps dialog box by typing ‘Snaps” in the search bar. In the dialog box, one is able to tick those snap points that are most appropriate for a given job. This customization means that you are snapping only to what is necessary, and, thereby, work efficiently without getting sidetracked.
Sharing the Same Origin for Linked Models
This becomes crucial for any projects that involve linked models precisely because it helps to position the linked model properly relative to the main model. Finally, there are two procedures to set mutual coordinates: In the Manage tab, the Coordinates button leads to the selection Acquire Coordinates or Send Coordinates. Getting coordinates from other linked models helps keep a project in sync with other linked files. The option also solves the issue of scale and position mismatch and enables cooperation with other disciplines within Revit.
Repositioning and Redisplaying Linked Models
Once one model is linked with another in the Revit, it may be required to be moved to the correct position. To help you fit the linked models perfectly in your project, work with Move, Rotate, and Scale tools. To achieve that, you need to work with the visibility properties of the linked models to organize the workspace and improve clarity. In the linked model you can also click on some parts and make them hidden or isolated to view certain aspects of the mode only. This can be done by right-clicking in the ‘Visibility’/’Graphics’ in the ‘View’ tab of the Revit application.
Worksets for Linked Models in Revit
In Revit, the concept of work sets is useful when necessary to coordinate several linked models within a large project. Worksets break down a project into smaller parts so that different groups can work on different aspects of a project at a time. In this case, those linked models can be assigned to worksets in the Worksets dialog accessible from the Collaborate tab. Here, you can control what model is visible to other teams and what changes one team can make to the model without affecting other teams’ work in Revit.
Control of Linked Model Visibility in Views
Controlling the visibility of linked models in Revit can help you tune in on some of the smaller portions of your design. In each view, you can modify how the linked models appear by switching to the Visibility/Graphic tab. Here you can switch the visibility of the linked model in the view and the level of detail you have of it. For instance, it can provide an option of how to present the linked model, is to present it in a less complex form or not to present it at all in a given view.

Troubleshooting Common Issues with Snapping to Linked Models
Dragging of existing linked models in Cad and Revit is among the special features that are essential in ensuring that the accuracy of designs is upheld when there are multifaceted designs. However, there might be situations when snapping does not behave as a user wants it to. Such problems normally occur from misconfigurations, mismatches between models, or from accidentally placing it at hidden visibility. Below are some issues related to the Snapping to linked models feature in Cad and Revit console, and the measures to take to correct them: To enhance the efficiency of the working processes, the influence of Cad and Revit on the level of the interaction with the linked models has to be explained in detail.
➢ Snapping Not Working with Linked Models in Cad and Revit
A very frequent problem that can be encountered when using Cad and Revit and linked models is the snapping problem. This can be done if the appropriate snap settings are not properly switched on. To rectify this check on the Snap to Coordination Models option. Find it on the Manage tab, where you can find a Snaps option in front of you. If this option is not chosen then Cad and Revit and other models will not snap to the geometry of linked models.
In addition, make sure the linked model is visible within your current view; if the visibility is toggled off, snapping will not work. Visibility/Graphics settings should be changed to make the linked model be seen or displayed in your project view. These basic checks make sure that Cad and Revit will snap properly to the geometry in the models that are linked.
➢ Linked Model Misalignment in Cad and Revit
What this means is a situation where one model is not properly linked to another either in Cad or Revit can make snapping non-events. This is normally so when the connected model is not oriented with the coordinates of the host project. To correct this, make sure that the shared coordinates are set correctly. Regarding the coordinates, you can opt for Acquire Coordinates from the same interface found on the Manage tab under Coordinates. This process makes sure that the properly coordinated of the linked model is in the correct plane for correct snapping.
Also, ensure several positioning options are applied during the linking process as in Origin to Origin or Shared Coordinates. In case these steps are not observed, the linked model may not line up well, resulting in problems whenever snapping to other geometry within the model. Getting the correct coordinate settings ensures Cad and Revit hooks to the linked model into the proper settings.
➢ Contextual Creation for Unintended Variables when Linking Cad and Revit
In Cad and Revit some of the times snapping works but snaps to undesired items within the linked model. This problem often occurs when Cad and Revit have several snap points due to which Cad and Revit In Illinois see irrelevant shapes. To correct this, you need to level the snap settings. Go to the Snaps dialog box and ensure that only the right snap points are enabled to the one you need. By turning off the undesired snap points one is in a position of offering Cad and revit time to target the proper geometry thus getting rid of snapping mistakes.
However, make sure that only the worksets containing the linked model are visible in the current view. You can verify and modify that using the Visibility/Graphics and make sure that unrequested worksets are not shown. Reducing the snap points and managing the visibility of Cad and Revit will enhance the snapping to linked models’ precision.
➢ Performance Problems with Linked Models in CAD and Revit
As the models get large or have many connections, Cad and Revit users complain of performance issues that impact snapping. These performance problems may be as the result of giant numbers of sheets, extra specifics of the model, or extra number of models involved in the project. For solving the snapping problems associated with the performance, the complexity of the linked model can be minimized by a reduction in its geometry. This could aid Cad and Revit to work through the model at a quicker rate, and with snapping, as well.
Further to this, it is recommended that all other unneeded linked models are to be unloaded in order to reduce load in the system. You can do this in the Manage tab by picking the Unload kinds for linked kinds that you do not require at the moment. Cad and Revit should undergo these modifications to optimize their performance and make the application to use only the active models while enhancing snapping precision. Reducing the chances of poor performance associated with snapping to linked models will be made possible by making sure that such models are well-managed and optimised.
➢ Dealing with Snap Offset Issues in Cad and Revit
Snap offset in CAD and Revit occurs where the snap point in one of the models that has been linked is not aligned with the geometry. This problem tends to manifest itself especially when the linked model came from different origin points as that of the host project. The only way to address this issue is to ensure that the simulation link was performed using the origin-to-origin method.
In case another positioning option like Center to Center or Shared Coordinates were applied it can result in the linked model being placed in the wrong position. If the origin points are misaligned, it will be possible to fix them by moving the linked model in relation to the reference model, using the Move tool. There is always a need to ensure that the pointers of the host project and the linked model in Cad and Revit are in agreement before snapping to the model.
How TVS Cube Can Enhance Your Cad and Revit Projects
TVS Cube provides professional animation services that can significantly enhance your Cad and Revit projects. Here’s how TVS Cube can help:
3D Visualization:
TVS Cube offers an animation service where clients have an opportunity to appreciate 3D models of Cad or Revit before the start of construction.
Realistic Rendering:
Realistic rendering solutions at TVS Cube, we help to make your Cad and Revit designs come alive with real textures, lights, and shadows.
Walkthrough Animations:
The animated walkthroughs of TVS Cube enable the presentation of Cad and Revit projects in various orientations where otherwise, the client has to imagine the space; this enhances the presentation of projects.

Enhanced Presentations:
The use of modern techniques provided by TVS Cube will enable you to present your Cad and Revit designs in a better manner convincing the client through animation.
Interactive Models:
With the help of TVS Cube, it is possible to create walkthroughs based on your Cad and Revit designs in which users can add interactivity and work with various aspects of the model while modifying their perspectives in real-time.
Project Marketing:
The animation services provided by TVS Cube can help to create promotional video that showcases the different aspects of your Cad and Revit projects which in return will enhance marketing and thus enable you to acquire more clients.
Blog Summary
In 2025, mastering the process of snapping to linked models in Cad and Revit is essential for seamless project coordination and precision. Revit 2025 Worksharing Monitor is a powerful tool that helps manage and track collaboration in a Revit project. By understanding the snap settings, aligning models correctly, and troubleshooting common issues, you can ensure that your workflows remain efficient and accurate. Utilizing linked models effectively allows for better integration between different design components, improving collaboration and project outcomes. Whether you’re optimizing settings or fine-tuning visibility, adopting these techniques in Cad and Revit will greatly enhance your design process, enabling you to deliver higher-quality results with confidence.