Skip to content


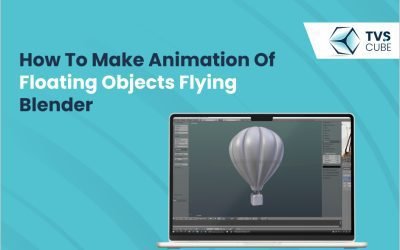
The robust and versatile open-source 3D modeling and animation software, Blender offers various tools for crafting dynamic Blender animations. One mesmerizing technique to animate an object is making objects appear to float or fly, which can be quite effective for enhancing scenes, visualizing concepts, or producing creative effects.
We will, in this guide, walk you through the process of animating floating objects in Blender, covering everything from initial setup to rendering the final Blender animation.
Setting Up Blender:
Ensure that you have the current version of Blender installed before diving into Blender animation. An interface of Blender can be customized, so for consistency, we will use the default layout. If you’re new to Blender, educating yourself with the interface and basic navigation will be useful.
Creating or Importing Objects:
Creating Objects:
- Open Blender:
Launch Blender and start a new project or open an existing one.
Add Objects:
- Basic Shape:
Press Shift + A to open the “Add” menu, and choose a basic shape like a sphere, cube, or cylinder, depending on what you want to animate.
- Customize:
Use the “Edit Mode” (Tab key) to modify the shape or create more complex objects.
Importing Objects:
- File Formats:
If you have pre-made models, you can import them using formats like .obj, .fbx, or .blend. Go to File > Import and select the appropriate format.
- Positioning:
After importing, position your objects in the scene using the move, rotate, and scale tools.
Setting Up the Scene:
Import Models:
- Lighting:
Good lighting enhances the appearance of floating objects. Add lights (e.g., Point, Sun, Spot) by pressing Shift + A and selecting “Light.”
- Camera:
Position the camera to frame your scene. Press Shift + A and choose “Camera.” Adjust its position and angle to capture the best view of your floating objects.
- Background:
Add a background or environment if needed. This could be a simple plane for a floor or a more complex HDRi image for realistic lighting and reflections.
Animating Floating Objects:
Basic Animation with Keyframes:
- Select the Object:
Click on the object you want to animate.
Set Initial Position:
- Frame 1:
Move the object to its starting position. Ensure you are on frame 1 in the timeline at the bottom of the screen.
Insert Keyframe:
- Location:
With the object selected, press I to bring up the keyframe menu and choose “Location” to record the object’s position at frame 1.
Move to Another Frame:
- Change Position:
Move to a later frame (e.g., frame 30), reposition the object to its new location (higher in the air, further along its path), and insert another keyframe by pressing I and selecting “Location.”
- Preview Animation:
Press the spacebar to play the Blender animation and see your object move between keyframes.
Using Graph Editor for Smoother Motion:
- Open Graph Editor:
Switch to the Graph Editor from the layout tabs.
- Adjust Curves:
Select the keyframes and adjust the curves to smooth out the motion. For floating effects, smooth curves with ease-in and ease-out can create a more natural floating effect.
- Modify Keyframes:
Add or move keyframes to refine the motion. You can adjust the interpolation type (e.g., Bezier) to control the speed and smoothness.
Adding Floating Dynamics:
- Apply Physics:
For more realistic floating, use Blender’s physics simulation.
- Select the Object:
Click on the object you want to apply physics to.
- Add Rigid Body:
Go to the “Physics Properties” tab and add a “Rigid Body” physics simulation. Set the type to “Active” for objects that will move.
Configure Physics:
- Gravity:
Adjust the gravity settings to simulate floating or hovering. Lower gravity settings can create the effect of objects floating or gently falling.
- Simulation:
Press Alt + A to play the physics simulation and see how the object behaves.
Adding Advanced Effects:
Add Modifiers:
- Displace Modifier:
Add a Displace modifier for additional floating effects. This modifier can add turbulence or waves to the floating object, simulating wind or water effects.
Configure Displacement:
- Texture:
Apply a texture to the Displace modifier to control how the displacement affects the object.
- Strength:
Adjust the strength and direction to simulate different floating behaviors.
Animating Multiple Objects:
Animating Multiple Objects:
- Group Objects:
Select multiple objects and animate them together if they need to float in a synchronized manner.
- Use Constraint:
Apply constraints like “Child Of” or “Follow Path” to create coordinated Blender animations where objects follow a specific trajectory or path.
Rendering the Animation:
Set Render Settings:
- Output Settings:
Go to the “Output Properties” tab and set the file format (e.g., MP4, AVI) and output resolution.
- Frame Range:
Set the start and end frames for your animation.
Render Animation:
- Render:
Go to Render > Render Animation to start rendering. Blender will process each frame and compile them into a video file.
- Preview and Export:
Once rendering is complete, preview the Blender animation. Export the final video file to share or incorporate into other projects.
Tips for Effective Floating Blender Animations:
Smooth Motion:
Ensure seamless transitions between keyframes for a realistic floating effect. Use the Graph Editor to fine-tune the Blender animation curves.
Secondary Motion:
Add secondary motion or small oscillations to improve realism. Floating objects usually have slight movements that mimic real-world dynamics.
Lighting and Shadows:
Adapt lighting and shadows to complement the floating effect. Shadows can help ground the object and add depth to the scene.
Render Quality:
Experiment with render settings to achieve the desired quality. Higher resolution and anti-aliasing can improve the final Blender animation’s visual appeal.
Conclusion:
Animating floating objects in Blender provides a creative way to visualize movement and dynamics within a 3D area. TVS Cube can craft captivating animations that showcase objects gracefully floating or flying through your scenes by following the steps summarized in this blender animation guide.
From setting up the initial scene and animating with keyframes to applying advanced effects and rendering, Blender provides the tools necessary to bring your floating animated objects to life. You’ll be able to produce spectacular Blender animations that grasp the significance of floating and flying in a 3D environment with practice and experimentation.