Skip to content


“Looking for helpful tips? If so, read on to learn more about 3D Product Modeling and How To Do It! Find out how product concepts can be converted into digital marvels with the help of effective tools & methods, and software. This blog starts with the definition of 3D product modelling, offering information on concepts such as basic shapes, textures, rendering and everything an aspiring designer needs to know to begin today.”
3D Product Modeling is widely used in the digital design age to give a realistic feel to the object depending upon the material and appearance of products. Regardless of whether you work in graphic design, marketing, or as an entrepreneur, knowing how to work with 3D Product Modeling can enhance the look of your products and simplify prototype creation. In this blog post, we’ll cover the steps to turn a mere concept into a beautiful 3D model. Everything, right from choosing the TVS Cube to defining edges and shadows, as well as the final brokerage will be covered in the guide. It is now time to kick-start your first sensational 3D Product Modeling masterpiece.
What is 3D Product Modeling?
3D Product Modelling is the creation of a full-scale or scaled-down virtual assortment of a product utilising emerging software solutions. It entails creating and modeling a product, including designing and carving the options of a product refining an outlook of the product and the appearance of its surfaces. Common in businesses such as e-commerce platforms, manufacturing, and marketing, 3D Product Modeling enriches visualisation, makes it easier to prototype, and offers realism to ideas.
Choose the Right Tools for 3D Product Modeling.
The first and most basic step in 3D product modeling is choosing the right tools. The software and hardware were developed to determine the final model’s efficiency, intuitiveness, and quality. Discover the best strategies for making the right decisions about your 3D Product Modeling process here.
Identify Your Needs
It is recommended to define either the specific needs of your project or a clear goal that needs to be achieved. Do you need basic structures for your home, or do you have complex structures for your work? Newcomers can use easy to master kinds of software while on the other hand, skilled users demand software with many features.
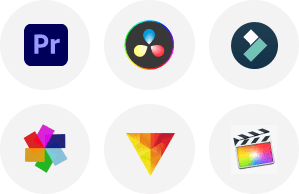
Popular 3D Modeling Software
- Blender: An ideal and free-of-charge software good for use by learners and professionals at large. It provides a complete solution for modeling, shading and rendering.
- Tinkercad is ideal for anyone who wants to learn to model products in 3D. This software can be run in a browser and is optimised for using basic shapes.
- Autodesk Fusion 360: A great product for any designer. It combines a CAD/CAM/CAE platform and provides users with engineering-grade models.
- Autodesk Maya: Maya is widely used by designers while focusing on the keen line and depth. Its modeling, animation, and rendering are beyond remarkable and perfect for intricate works.
Hardware Considerations
- Powerful CPU: All these are to enable proper and smooth rendering and processing takes place.
- Dedicated GPU: Required for working with three-dimensional graphics & images.
- Ample RAM: Ideally, the system should have at least 16GB of RAM for multitasking to avoid slowing down.
- Storage: Use SSDs for large model files as they will employ them optimally.
Access Online Resources
Most of the tools contain instructions on how to use them, along with general instruction manuals. These should be used to enhance understanding of the software and help with 3D Product Modeling.
Selecting TVS Cube for the right tools will make sure you are ready for any 3d product modeling challenge you tend to work on.
Step-by-Step Guide to 3D Product Modeling
3D Product Modeling is a fascinating process that combines creativity, technical skills, and attention to detail. Let’s break the process into eight clear steps, each essential for creating a high-quality 3D product model.
Conceptualize Your Design
Any great model is based on a certain concept. First, the five steps in writing should be followed: imprinting, visualisation and creating a concept of the product and its role. Is it the next-generation technology device, an intricate component of a machine, or a trinket? A final suggestion is to draw sketches or use blueprints and, if you have none, reference images. Pre 3d product design will help you save hours in your 3D Product Modeling since when you do more conceptual designs, you are guided on what exactly you are going to do.
Choose Your Modeling Software
This decision is critical. Here are the best choices when it comes to selecting suitable software: For simple design concepts, beginners can use free software such as Tinkercad, but for complex designs, Blender, Fusion 360, and Autodesk Maya are recommended. When choosing the correct software, complexities are reduced, and new opportunities for creativity in the 3D Product Modeling Process appear.
Create Basic Shapes
Begin your model with the basic ingredients: cubes, spheres and cylinders. Some of these shapes are used as the elements to form your design. For example, a round base could develop into a cup base, while a cube base could develop into a box base. It shall be understood here that it provides a framework that will later be expanded on; hence, the intention here is to ensure you understand the foundational skeleton of the product being developed.
Add Details and Refine
This is the stage where all the base structures are already set. Now, it’s time for modeling or sculpting. Other options, such as extrusion, bevels and smoothing, help form the product into a better and more accurate shape. This is the area where the beauty of 3D Product Modeling is most cherished. To give the model some effect and elegance, thin lines create grooves, patterns or curves on the object being modeled.
Light Your Scene
Lighting creates the environment into which all the model creations are introduced. Good lighting increases the level of detail, enhances the layering of the model, and improves the overall quality of your 3D Product Modeling project. For the best result, try using directional, ambient, or point light sources. A lit background makes the model look professional and contributes to a good impression during presentations or other related portfolios.
Render Your Model
In other words, rendering is the final step in creating a visually pleasing image or object from a designer’s model. Instead, use the combined capabilities of your software to create effects such as shadows, reflections and backgrounds. This step in 3D product modeling gives your creation a nice, realistic look to make the required impression on clients or the audience.
Export and Share
After the model has been fully developed, you can export it in an apt format. When using 3D printing, stick to STL files, and for the virtual platforms, go for OBJ or FBX files. It’s about sharing your model on sites such as Sketchfab or returning it to projects so that it gets to the desired audience. Exporting correctly is the last process after completing 3D Product Modeling.
Our Animation Services at TVS Cube
- 2D Animation: Design interesting and engaging 2D illustrations that put across your brand’s message or convey your story.
- 3D Animation: Make complex ideas easy to understand by using realistic and descriptive 3D animations guaranteed to make your creations stand out.
- Frame-by-Frame Animation: Get clean, timeline, standard animation in a way that doesn’t look computer-generated but has a very organic and artistic feel.
- Cartoon Animation: Bring character and entertainment to your 3d product modeling company with exciting and colourful cartoony animations that will appeal to consumers.
- Character Animation: Create entertaining personalities with gestures and feelings that explain a tale and capture the audience’s attention.
- Creative Expertise: Utilize the best quality technologies and innovative techniques to create unique animation that will be stunning.
- Custom Solutions: Custom animation solutions for projects across marketing videos and entertainment content as per the requirements.
- Engage & Impact: Our animations aim at getting the audience’s attention and improving the message conveyed in words.
Set Up Your Workspace for 3D Product Modeling
The organisation of work is important for carrying out 3D product modeling, and the organisation of the workplace forms a basis. The environment plays a role in helping you produce work to the best of your abilities, whether from a perspective of efficiency, inspiration, or comfort during long 3D product modeling sessions. Right from selecting the right hardware, to arranging ergonomic furniture, everything that goes into creating your workplace affects the efficiency rate. Now, let’s look at some key features of successfully delivering a perfect 3D Product Modeling work environment.
Choose the Right Location
Choosing the proper place for your office is the first measure toward creating a practical work environment. A quiet environment means that there are no distractions that might pull your attention away from aspects of 3D Product Modeling. Instead of ceiling lamps, it is better to have lamps which can be regulated so that natural light is available, but additional artificial light can be used when needed. Desk light that has dimmers or LED strips with warmer lights can enable adequate visibility during elongated hours while minimising glare.
Use High-Performance Hardware
The foundation of a 3d model product environment is a potent computer and related machinery. As with most software applications, the actions occurring on a model require a great amount of computational performance, which is why it is possible to recommend an Intel i7/i9 or AMD Ryzen 7/9 CPU. Yet, it’s crucial to have dedicated graphics, like NVIDIA RTX or AMD Radeon series, which provides stable graphics processing. Sufficient RAM, depending on the scale and complexity of operations, is required, 16GB and above. SSD means solid-state drive – installing this will mean faster file access times and smooth work. Mostly, the higher VRAM for dedicated graphics cards supports pin-sharp at 1920 x 1080 or higher for accuracy in 3D product modeling results.
Optimise Ergonomics
Comfort is very important in ensuring that there is no strain during the 3D product modeling meetings that may last for several hours. The first step should be to buy a good, comfortable chair that assists in maintaining correct spinal curvature and good posture. The height of your desk should permit your forearms to lie flat on it when you are typing or handling the mouse. Recommended to try a height-adjustable desk or a standing desk where one spends some amount of time sitting and another amount of time standing. An ergonomic mouse and keyboard also help in preventing strain during the times of use for long hours. Concerning these points guarantees that you will not be interrupted by matters of discomfort when working on 3D Product Modeling or 3d product visualization.
Structure of Software and Peripherals
Having a clean environment in both the online and the offline workplace matters a lot when it comes to the productivity of work. Arrange your 3D product modeling software to keep your most used tools pinned on the top or docked in the first row of the screen. Position your other peripherals like graphics Tablet, 3D mouse, pencil or stylus in a good reachable manner. Of various graphic tablets, the ones specialised for precise work can prove to be very beneficial in the course of precise 3D Product Modeling. Keeping all the cables out of the way by using clips or cable sleeves is essential for a neat working area, which greatly reduces the chances of the employee getting distracted.
Develop a Plan for Backing up and Storing Data
Another important aspect of your work area organisation is how files are arranged. We recommend buying external storage, such as a portable SSD or HDD, to back up your work frequently. Applications such as Google Drive or Dropbox may also provide additional protection and convenience so that your project data will never be lost. A well-arranged file system on your primary and backup storage devices is also advantageous, as it saves time when searching for files or sharing them.

Exporting and Using Your 3D Model
The last stage in constructing 3D Product Models is to export and use your model. This stage ensures that all your efforts are well prepared for their ultimate use, whether in marketing campaigns or ready for 3D printing, a video game or animation. To help you with the exportation and use of your model, let’s divide this process into four sections.
Selecting an Appropriate File Format
With exporting, the very first thing that one should consider is the format of the file of your 3D model. Certain formats are needed for certain applications, meaning sometimes you need a specific format for all applications connected to a certain platform. It is generally an Object File Format with different extensions such as .obj, .stl, .fbx or gLTF. OBJ is well suited for non-realty purposes in 3D and 3D rendering since it retains features like texture and material. For its part, STL is the preferred format of 3D printing because it deals only with model geometry. FBX is used for animations, game development and interactive experiences because more feature such as rigging and animation data, is supported in it. GLTF is designed specifically for the web and does not require any scene post-processing as it has built-in compression for real-time rendering. The criteria for format selection depend on the usage of the model.
Model Tuning Before Export
It’s often necessary to prepare your model for export and that means readjusting the settings for performance as well as compatibility. If your model should be utilised in such application areas as games or virtual reality, optimise the mesh, cutting off polygons that are not critical for the image. The problem that comes with high polygon models is that it will cause lag when played on a device with a lower processing power. TVS Cube 3D printing makes sure your model is manifold, and nothing can penetrate the model, which simply means that the mesh must be closed. You should also look for non-manifold edges that could create server problems when you are printing. Most 3D product modeling programs nowadays have utilities that can recognise such issues and repair them before the exportation of the actual model.
Exporting Your 3D Model
After that, one should export the best model in the selected format for the best result possible. The export function in most 3D modeling software is simple. However, before exporting, particular emphasis should be placed on the scale, orientation and other requirements. A few of them provide options in deciding how the export resolution or precision should be set, this determines the file size as well as the quality. Double-check that the elected version of your model is the right one to export, as you may have several versions. It is especially useful after export, if you ever had to create backup copies in different formats if you want the model to be used in different platforms or applications.
Sharing Your 3D Model Across Platforms
Once you export your model it becomes ready for use in the environment where you introduced it to. In case you decide to use this model for a marketing campaign, it can produce some pictures or animation that best fit the setting of the product. These can be used in TV commercials, online websites or billboards. For 3D angle and size, a digital STL file can be uploaded to the printing service, or you can print the item yourself using a 3D printer. If you are in a gaming landscape or Sculpting virtual world, use the FBX or GLTF in the correct game engine, for instance, Unity or Unreal. Every platform has its settings and fine-tuning, but once imported correctly, your 3D model can be incorporated into interactive or purely informational applications, depending on your project.
Blog Conclusion
In conclusion, creating a 3D model of a product is a rewarding process that involves the right tools, techniques, and attention to detail. By following the steps outlined—choosing the right software, optimising your workspace, and ensuring the final model is well-optimized—you can successfully bring your product designs to life. Whether for marketing, prototyping, or virtual use, 3D Product Modeling is essential for modern product development and innovation.