Skip to content


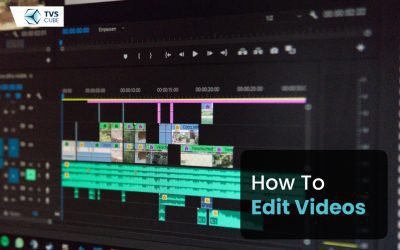

According to research, a whopping 91% of companies today rely on video marketing strategies. As a result, video content has become the most effective method of communicating to an audience through social media posts and professional advertisements. The actual element of magic that works in a video is in the post-production or, more specifically, in the process of editing. Video editing is not only for professional use nowadays; rather, it is a powerful tool for telling important messages in today’s fast-moving society that is heavily rooted in digital media. This guide will explain everything from where to start and what tools you should be using, to how you can turn your vision into a reality. Now that’s out of the way, let’s go into the world of video editing!
What is Video Editing?
Video editing is the action of assembling, overdubbing, and fine-tuning video material that has been filmed to generate an interesting narrative. Editing work involves slicing clips with effects, transitions, and sound and managing visuals for storytelling or when passing a particular message. Everyone needs this skill when filming for a documentary, commercial business, or even home videos and social media platforms.
Key terms include:
- Timeline: The environment we make use of in compiling the clips.
- Transitions: Cuts are applied to allow transition from one scene to the other.
- Rendering: Finalizing the video.
- Resolution: Video Editing – quality.
- Frame rate: The difference between the two indicates how smooth playback is in frames per second.
Essential Tools and Software For Video Editing
Beginner-Friendly Options
Newcomers to video editing should consider using iMovie, Canva, and Clipchamp. The app is available only for Mac users. It allows users to cut and trim the video, use transition effects, and adjust basic sound parameters, making it perfect for home or low-key projects. Even though Canva was developed primarily as a graphic design tool, it offers a video editor suited to creating short, professional clips for social media based on pre-made templates. TVscube offers video editing service that can be very effective for professionals but, at the same time, provides all the necessary services for cutting, applying effects and exporting videos.
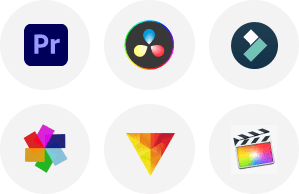
Professional Software
The professional programmes for video editing are Adobe Premiere Pro, Final Cut Pro and DaVinci Resolve. Adobe Premiere Pro is the tool demanded for its universality. It overloads professional tools for fine cutting, colour correction, and components compatibility with the Adobe development line. Final Cut Pro is also available only for macOS and it offers good performance and a straightforward timeline in accordance with professional needs. DaVinci Resolve takes the crown in colour grading and is an editing software that includes VFX and audio post-production, making it a go-to for professionals and filmmakers.
Budget Considerations
There are a lot of video editing tools, which are free of charge and paid, to meet the needs of everyone. For users who do not want to spend any cash on the software, there are free iMovie and Clipchamp for newbies, as they do not contain many advanced features. Currently, Canva has an offering, particularly for those who are new to the software, but the user has to pay for the high-quality template and other stock media. From a professional point of view, Adobe Premiere Pro can only be downloaded as a monthly subscription; this option might be expensive for occasional users, but it is very libre. As an example, Final Cut Pro is not a subscription-based software, unlike Adobe Creative Cloud Suite; thus, in the long run, Video Editing cheaper for Mac users. DaVinci Resolve has a free version with many features, while the paid version provides even more professional tools at a reasonable price.
Step-by-Step Guide to Video Editing
Step 1: Import Your Media
The first thing that needs to be done when working on a video editing is to capture your content in the software. Regardless of which video editor you’re going to use, the first step is always sorting the raw footage, audio files and images into the folder. Categorize and import such assets into the project library, organizing it professionally to prevent confusion at the later stages. The general secretary aspect came out well, showing that orderliness helps reduce time and generate an efficient and effective schedule. Organize and categorize label clips according to their contents or if they are positioned sequentially so as to easily search and place these clips on a timeline.
Step 2: Trim and Arrange Clips
Once your media is imported, start ‘cutting the unwanted parts of the raw clips as one might have made mistakes, taken a ‘shot break or do not require those portions in the final clips. Organize the clips on the timeline in a way that fulfils the goal of telling the viewers a particular story. Maintain a sense of rhythm; let’s not jump quickly from one topic to another, especially if we think our audience might get lost. It is vital to this step since it will lay the groundwork for your video editing and help grab viewers’ attention as well as create cohesion.
Step 3: Add Transitions and Effects
Transitions and effects complete the package and are certainly useful; however, they should not be overused. For a more professional east transition, add fades or dissolves when switching from one clip to another. Too much use of flashy effects hinders customers’ ability to concentrate on content. Some effects like zoom-in or slow motion should be considered in the process of cinematography to emphasize specific events. Closely related to the former, moderation keeps a creative video editing professional while remaining rich and entertaining.
Step 4: Coming with Music and Sound Effects
Ever wondered how music can be used in films and effects and sounds to complement the feeling of the video? Make sure they also fit the show’s theme so as not to drown out dialogue or visuals to audiences. Go to Epidemic Sound or YouTube’s Audio Library for noncopyrighted music. Sound helps to make scenes more lively and realistic: now, more and more authors add footsteps or other background sounds to their films. It is as simple as this: the volume of the sound being used in the production of the video editing has to be well and properly balanced.
Step 5: Writing and Placing Text, Titles and Graphics
Subtitles, titles, and graphics are the elements of text that help to make your video interesting and as informative as possible. Just as you would create titles for your film, make use of intro and outro titles to make your video as professional looking as possible, as well as incorporate subtitles for the benefit of the hearing impaired as well as others who may have a hard time following along. Teaser gumboots like lower thirds or call-to-action banners can elongate an essential focus or direct an audience. Always write text concisely and clearly, avoiding using fancy printers and choosing styles that match the topic of your video.
Step 6: Color Correction and Grading
Meaningful colour correction and grading are critical for making your video editing look better. Try to set the brightness of the skin tone to a highly accurate number, the contrast to achieve a close enough value to that of the natural image, and finally, the saturation to a value just slightly below that of the natural skin tone. In order to add more cinematic experience, explore color grading for mood and setting, for instance, warm colors for retrospection or cool colors for drama. Every editing tool has options that make enhancing visuals easy the options enable you to achieve this without stress.
Step 7: Export Your Video
The last process in video editing is publishing the video in the right resolution and format. Self-selection is important depending on the platform; for example, 1080p is common for YouTube, and only vertical videos for Instagram Stories. Make sure that an appropriate file size is reached for the upload and still not less quality lost. Most of the software out there has templates for different platforms in order to help meet the required standards. Use this feature to check your video editing before exporting and sharing it with no chance of going back to fix mistakes.
Advanced Tips for Improving Your Edits
Knowing all the basic features of the program is not enough here and now; it is necessary to learn more and constantly evolve. However, to intensify your edits, you have to elevate yourself to a new level through the use of sophisticated techniques on your videos. Here are some tips to elevate your editing game:
Use Keyboard Shortcuts
Time is always of the essence when working on any editing, and shortcuts when using the keyboard can cut down the Timeigo Foundation. Almost all editing software enables the user to assign shortcuts to any task that is most commonly performed s, such as cutting, copying, pasting, or even moving the cursor along the timeline. The application of these tips also minimizes the use of a mouse and optimizes a computer’s effectiveness.
Master Advanced Transitions
Although basic cuts and fades work fine for most videos, using complex animations will give a professional outlook to the whole business. Some common transitions are match cuts – a cut between two shots that matches the action or shape of a subject – or masking transitions – when one shot reveals the other by masking off or transitioning the scenes. These transitions should also be well timed and do not have to be used excessively to over do it.
Experiment with Speed Effects
These shooting speed ‘canned’ effects including slow motion and time-lapse, are usually useful when you want to build drama or energy in your video. There are scenes of slow motions for reaction or action and scenes of time lapsing for sequenced events which for a long time can be summarized in one clip. Approach the speed effects more cautiously in order not to disturb the pace with jolly pictures.

Enhance Audio with Precision
The quality of the audio is as important as the outer look of a video. Get special tools to minimize the background noise, equalize the loudness, and make the audio seamlessly fit the video. Use within sound effects transition such as fades to ensure one realizes that they have transitioned from one segment to another and not abruptly. When two or more audio tracks are put over each other, for example, background music and sound effects, it produces a better experience.
Emphasis on the Elements of Layering and Compositions
The application of interactivity involves stacking up different clips, graphics or effects in a video. For example, overlays such as light leaks or texture can provide an ambience to a movie. In general, ensure objects and subjects are well placed and fall into the rule of thirds for the perfect shot.
Use of Motion Graphics & Animations
If your video editing has too much text on the screen, which could be confusing or boring, you can help by animating the text or even the icons you are using. Some software packages like After Effects or plugins within your editing bay enable this kind of transition. Supplementary animations can draw the viewers’ focus or underscore the points without overloading the video.
Develop Only The Best With Feedback
Lastly, post your work to edit online to get feedback from other people or lecturers. It is possible to get insights into how to improve the next piece of work in progress or even get new ideas from observing how others perceive the work done. The only option is to practice regularly in order to discover an editing style that fits you and your audience.
Common Mistakes to Avoid
Video editing is a creative process, but certain common mistakes can undermine the quality of your work. Avoiding these pitfalls will ensure your videos remain professional and engaging.
Overusing Transitions and Effects
While transitions and effects can add flair, overusing them often results in a cluttered and amateur appearance. Stick to subtle, purposeful transitions like fades or cuts to maintain a polished look. Reserve elaborate effects for moments that truly enhance the narrative.
Ignoring Audio Quality
Poor audio can ruin even the most visually stunning video. Failing to balance sound levels, leaving background noise unfiltered, or using low-quality music can distract viewers. Always use audio tools to clean up and equalize your soundtracks, and opt for royalty-free, high-quality music and effects.
Inconsistent Color Grading
Uneven colours between clips disrupt the flow of your video. Forgetting to colour-correct or grade your footage results in mismatched tones that distract viewers. Use consistent colour grading across all scenes to maintain visual harmony and elevate the mood of your content.
Neglecting Pacing
Rushing through edits or dragging scenes too long affects the pacing of your video. If your cuts are too abrupt, viewers may feel disoriented; if they are too slow, they may lose interest. Keep the rhythm dynamic but coherent, ensuring every moment contributes to the story.
Forgetting to Optimize for Platforms
Failing to export your video in the correct resolution or aspect ratio for its intended platform can diminish its impact. For example, vertical videos perform better on Instagram Stories, while widescreen is ideal for YouTube. Tailor your exports to platform requirements for maximum reach.
By staying mindful of these common mistakes, you’ll create polished, professional videos that resonate with your audience.
Final Words – Video Editing
Video editing is considered to be an art that every content producer needs in creating social media content, personal projects, or professional production. Just these four levels: Importing, trimming, adding effects, and enhancing with audio and text will allow for producing rather high-quality material. Later on, the higher level of complexity is achieved by additional techniques such as motion graphics, colour correction, or fine-tuning of the audio level. The final note to give is that experience is the key – keep trying and do not give up. In my opinion, TVS Cube videos are engaging, but it is equally important to use the appropriate tools and methodology to make your videos easily noticed and understood by more people.